Taz's JDM NA8 S-Special: I don't need no steenkin hire car

Chat to do with your MX5/Miata/Eunos Garage Ride(s).

Moderators: timk, Stu, -alex, miata, StanTheMan, greenMachine, ManiacLachy, Daffy, zombie, Andrew, The American, Lokiel

Taz_
Driver
Posts: 58
Joined: Sun Jul 19, 2009 7:31 am
Vehicle: NA8
Location: Sydney
Contact:

Re: Taz's JDM NA8 S-Special: I don't need no steenkin hire c

Postby Taz_ » Sat Dec 31, 2011 9:15 pm

Well this thread needed an update, to cover the full story we have to go back...

I've had a few maintenance items replaced on the car with the help of friends while I was living overseas. Couldn't be on the road without them.

Betty developed a misfire a while back and we were stumped on what to do to fix her...

First the coil packs were changed.

The difference in response and power was there, so all things moving in the right direction.

Old

Image

New

Image

But.... the misfire was still there but less so.

Taz_
Driver
Posts: 58
Joined: Sun Jul 19, 2009 7:31 am
Vehicle: NA8
Location: Sydney
Contact:

Re: Taz's JDM NA8 S-Special: I don't need no steenkin hire c

Postby Taz_ » Sat Dec 31, 2011 9:16 pm

So onto replacing the O2 sensor.

Old in the background vs. new.
Image

Bit more of an improvement.

BTW this is an abridged version. NGK Iridiums from Bab's and new leads were fitted prior to these items.

But it was still there...

Taz_
Driver
Posts: 58
Joined: Sun Jul 19, 2009 7:31 am
Vehicle: NA8
Location: Sydney
Contact:

Re: Taz's JDM NA8 S-Special: I don't need no steenkin hire c

Postby Taz_ » Sat Dec 31, 2011 9:17 pm

After moving back to Sydney the misfire was there intermittently, then almost everyday at low throttle and rpm. At full throttle the issue wasn't there and short of changing the TPS and AFM (quite expensive pieces) there wasn't much else to replace.

After searching on miata.net and hearing of similar issues with many other cars, the coolant temperature sensor at the back of the head (under the coilpacks) could be a culprit.

I rang around and found the part and decided to change it over since it wasn't too expensive.

Changing it over is almost a repeat of replacing the coilpacks since you need to take them out to access the sensor. There isn't much room back there since Mazda thoughtfully decided to put all of these bits at the back of the head very close to the firewall.

After many hours of work by my friends and many months of wondering what this issue was, replacing the sensor didn't take long at all. Even I managed to do it.

Here's the old sensor, it has a 12mm bolt size FYI and is located on the housing at the back of the head below the coil pack next to the cam angle sensor.

Important to note: This is an ECU coolant temperature sensor, also located on the same housing but on the exhaust side of the car is a temp SENDER for the temp gauge on the dash which points horizontally out from the side of the head. You don't need to change this unless your temp gauge is dead.

Image

Taz_
Driver
Posts: 58
Joined: Sun Jul 19, 2009 7:31 am
Vehicle: NA8
Location: Sydney
Contact:

Re: Taz's JDM NA8 S-Special: I don't need no steenkin hire c

Postby Taz_ » Sat Dec 31, 2011 9:17 pm

So the misfire of about 6months worth of annoyance is now officially fixed!!

And after a test drive, Betty and I are bonded once again. I have gone from having this niggling feeling at the back of my mind every time I drive her to really loving driving her all over again.

Fittingly we hit this milestone on the way home from fixing the long running issue.

Image

Taz_
Driver
Posts: 58
Joined: Sun Jul 19, 2009 7:31 am
Vehicle: NA8
Location: Sydney
Contact:

Re: Taz's JDM NA8 S-Special: I don't need no steenkin hire c

Postby Taz_ » Sat Dec 31, 2011 9:18 pm

Now to tidy things up...

Took the valve cover off, pretty easy to do. Then into the dishwasher!

Painting it and putting it all back together (while trying to save the valve cover gasket that was replaced recently) without hassles was the next challenge.

Valve cover was then cleaned with wax & grease remover.

Despite looking 100x nicer than last night's grungy condition, she won't be winning any beauty contests right now. Still looking a little tired.

Image

Now she's ready for paint!

Taz_
Driver
Posts: 58
Joined: Sun Jul 19, 2009 7:31 am
Vehicle: NA8
Location: Sydney
Contact:

Re: Taz's JDM NA8 S-Special: I don't need no steenkin hire c

Postby Taz_ » Sat Dec 31, 2011 9:18 pm

I decided on black wrinkle finish paint as it suits the style I am going for with the car. The black finish is also the same was what was used on the very limited production M2 1028 roadsters.

You have to be very careful especially with the thickness of the paint to avoid drips.

It transforms in front of your eyes from a smooth finish to an odd wrinkly finish and as time progresses you get the desired affect. I used a hair dryer on the heat setting to speed up the drying and to make the wrinkle finish tighter. Plenty of fumes, so trying their oven method did not sound like a good idea.

Here's a crappy shot of it, the finish gets tighter as time progresses.

Image

Taz_
Driver
Posts: 58
Joined: Sun Jul 19, 2009 7:31 am
Vehicle: NA8
Location: Sydney
Contact:

Re: Taz's JDM NA8 S-Special: I don't need no steenkin hire c

Postby Taz_ » Sat Dec 31, 2011 9:19 pm

I have wrinkle finish goodness!

Fitted to the car after some more heat and drying sets the paint with nice tight wrinkles and a nice finish all over.

Taken in a dark as underground carpark but you get the idea.

Image

I did all this while we were in a temporary apartment that we stayed in when we moved back to Sydney from Germany, managed to do it all on the little balcony and fitted it in their underground carpark so not having a garage/backyard didn't hold me back.

Now to clean the engine bay and give the paint some TLC.

Taz_
Driver
Posts: 58
Joined: Sun Jul 19, 2009 7:31 am
Vehicle: NA8
Location: Sydney
Contact:

Re: Taz's JDM NA8 S-Special: I don't need no steenkin hire c

Postby Taz_ » Sat Dec 31, 2011 9:19 pm

Before:

Image

After:

Image

Shaved/polished lettering to come...

Also note the cold air intake fitted. Added a noticeable increase in power and torque, plus the sound is rather tasty.

Need to get proper photos.

Taz_
Driver
Posts: 58
Joined: Sun Jul 19, 2009 7:31 am
Vehicle: NA8
Location: Sydney
Contact:

Re: Taz's JDM NA8 S-Special: I don't need no steenkin hire c

Postby Taz_ » Sat Dec 31, 2011 9:20 pm

Overnight parts from Japan...well not quite overnight. Had a friend who was living in Japan pick these up for me from Car Make Corn's while he was over there.

The wait was worth it.

Image

Image

Image

Taz_
Driver
Posts: 58
Joined: Sun Jul 19, 2009 7:31 am
Vehicle: NA8
Location: Sydney
Contact:

Re: Taz's JDM NA8 S-Special: I don't need no steenkin hire c

Postby Taz_ » Sat Dec 31, 2011 9:22 pm

Nice and shiny!

Image

Image

These mirrors made by Runabout Japan are replica's of the very limited production M2 1001 & 1002 Roadsters sold in Japan. These are the later model versions with blue tinted glass in the mirrors. Plug and play, stainless steel and amazing quality.

Taz_
Driver
Posts: 58
Joined: Sun Jul 19, 2009 7:31 am
Vehicle: NA8
Location: Sydney
Contact:

Re: Taz's JDM NA8 S-Special: I don't need no steenkin hire c

Postby Taz_ » Sat Dec 31, 2011 9:22 pm

Annnnd fitted...

Image

Taz_
Driver
Posts: 58
Joined: Sun Jul 19, 2009 7:31 am
Vehicle: NA8
Location: Sydney
Contact:

Re: Taz's JDM NA8 S-Special: I don't need no steenkin hire c

Postby Taz_ » Sat Dec 31, 2011 9:35 pm

Did you know that Betty has 10, count them 10! Speakers in her? Fun fact, that's more than the 350z with the Bose (Blose!!) system.

MSSS Premium sound yo. (Mazda Sensory Surround Sound)

2x 5.25" lower-door full-range speakers
2x 1.5" door -mounted tweeters
4x 3.5" headrest speakers
2x seatback-mounted bass transducers ("thumpers") - These are speed sensitive (become a bit more powerful by 10dB between 10 and 25mph) and produce no sound but vibrations on your lumbar.

I always wondered what that orange ALC light on the stereo meant...

The ALC automatically adjusts the bass feel (no sound) on the special lumbar speakers. This output, called "BODYSONIC", can increase a maximum of 10(db), and only between 12 and 25 MPH. Please explain this feature to your customers.


Comes with an internally mounted amplifier and separe sound processor, state of art premium stuff in 1994...

Now none of this means it sounds as good as a modern premium stereo, far from it. Rather interesting (well to me)!

Taz_
Driver
Posts: 58
Joined: Sun Jul 19, 2009 7:31 am
Vehicle: NA8
Location: Sydney
Contact:

Re: Taz's JDM NA8 S-Special: I don't need no steenkin hire c

Postby Taz_ » Sat Dec 31, 2011 9:37 pm

Bit of an update:

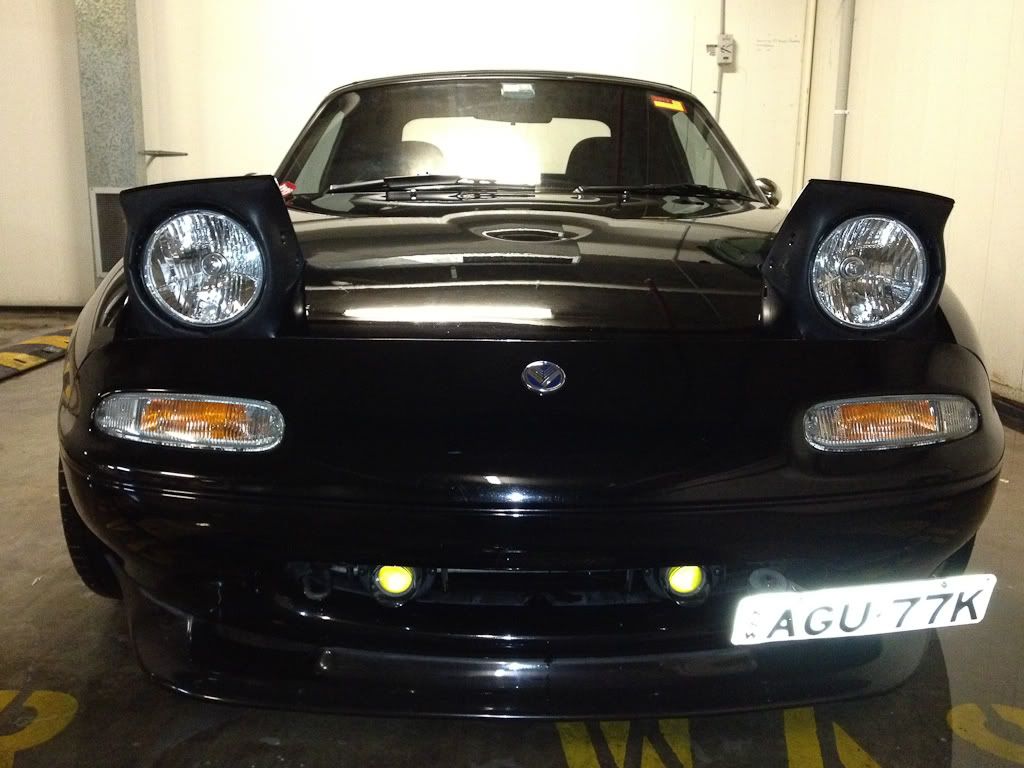
Ironically after passing a legit pink slip, I noticed Betty's passenger side headlight was not working on low beam but was fine on high beam. Rather than being a mysterious issue it was simply the bulb needing replacement.

On import models including JDM and USDM cars they use sealed beams unlike the Australian delivered models. I found this out after doing some research and opening her up.

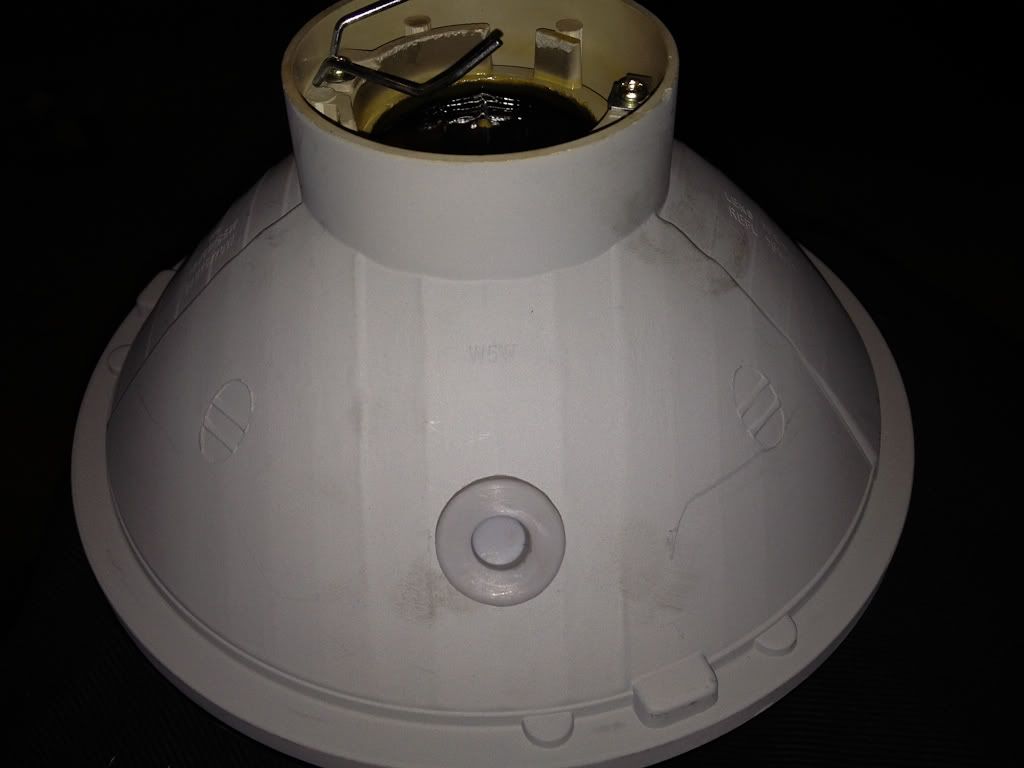
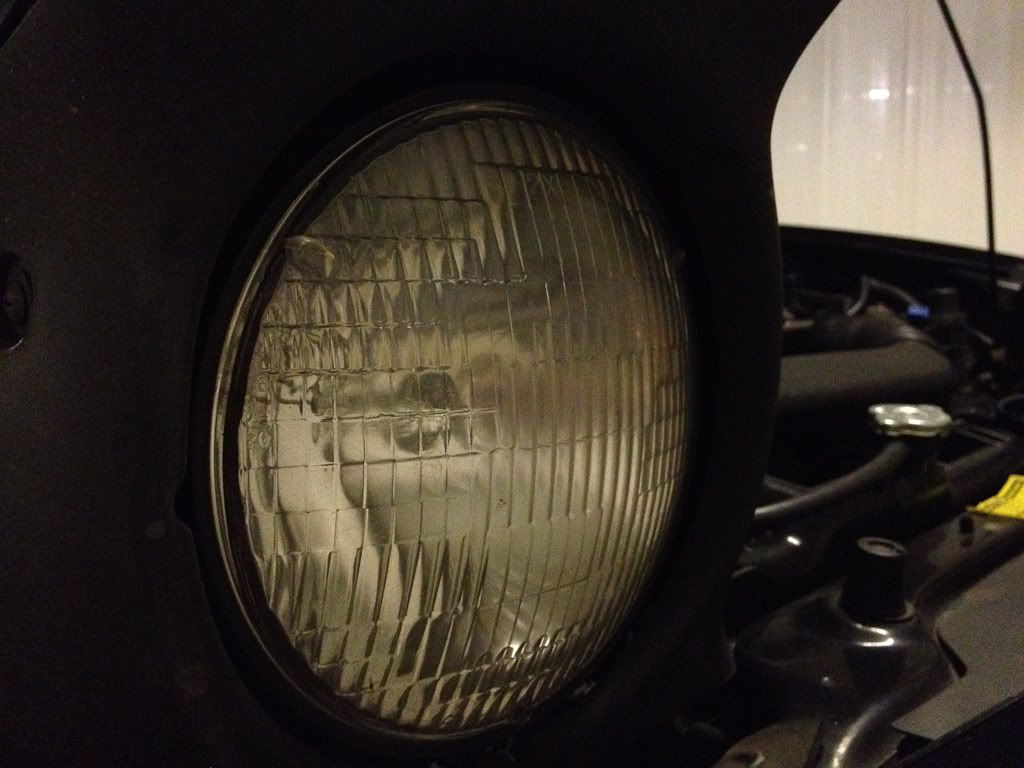
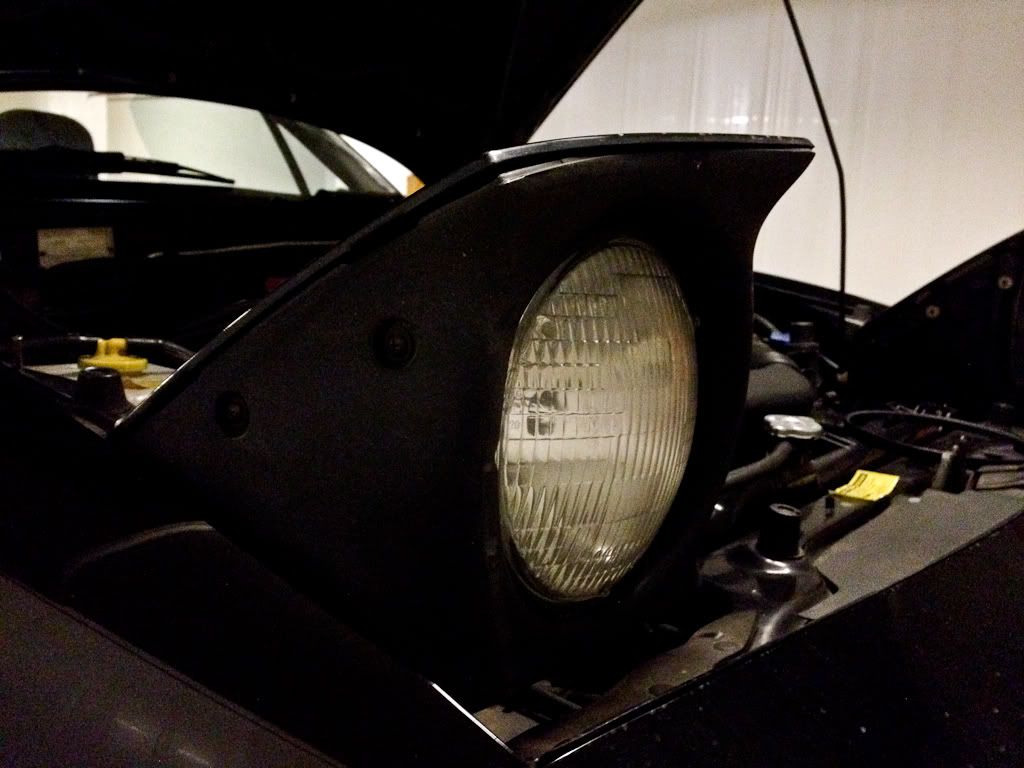
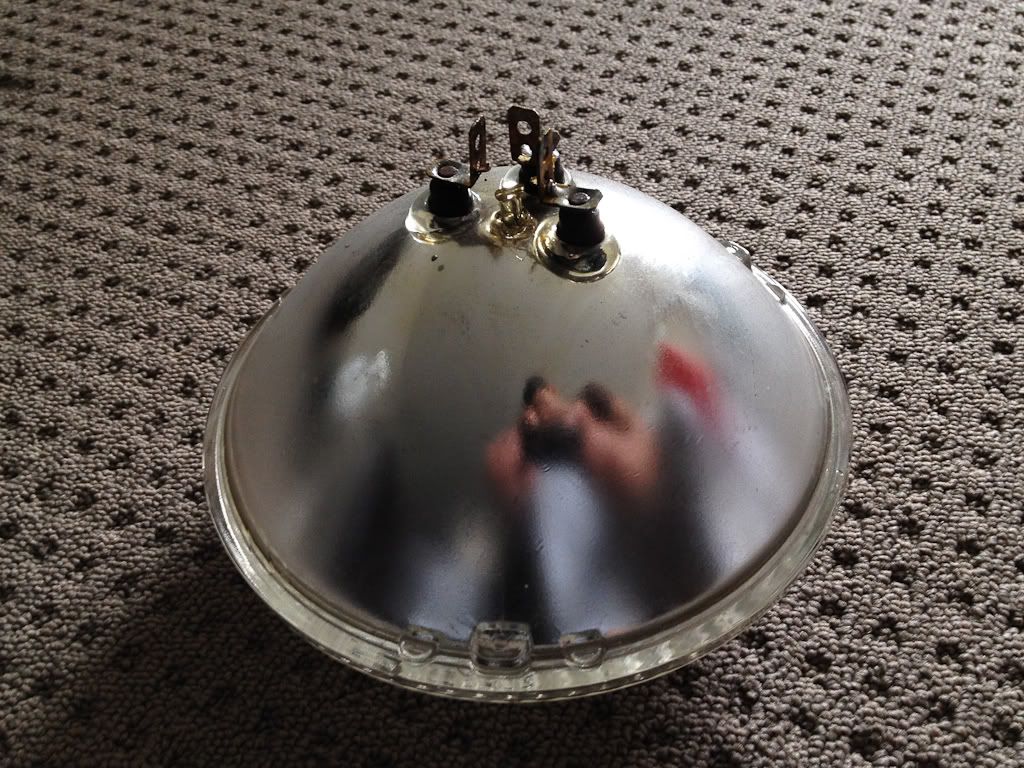
We start here, with a standard original sealed beam unit.
Image

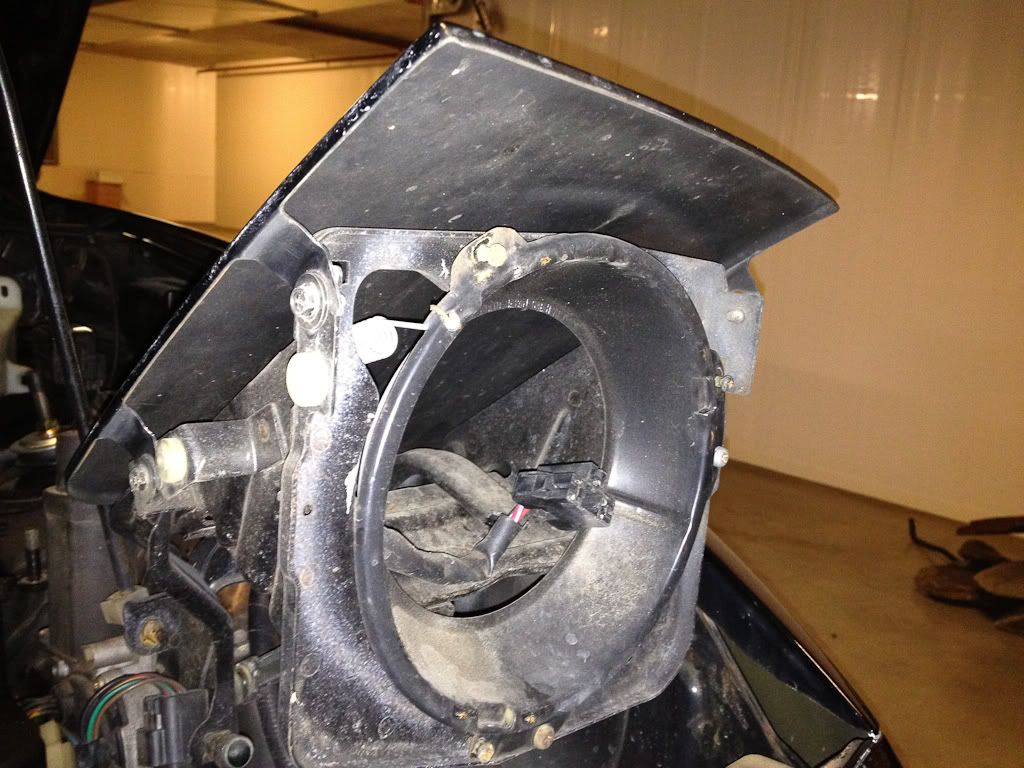
Next we remove the two screws on either side holding on this plastic shroud
Image

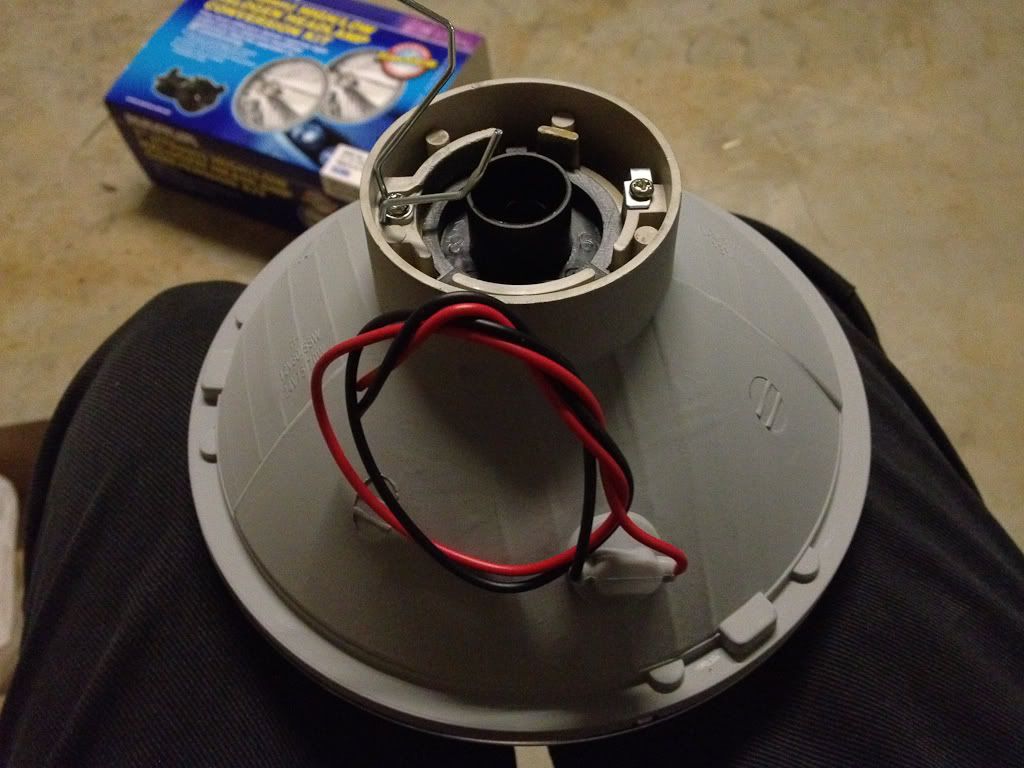
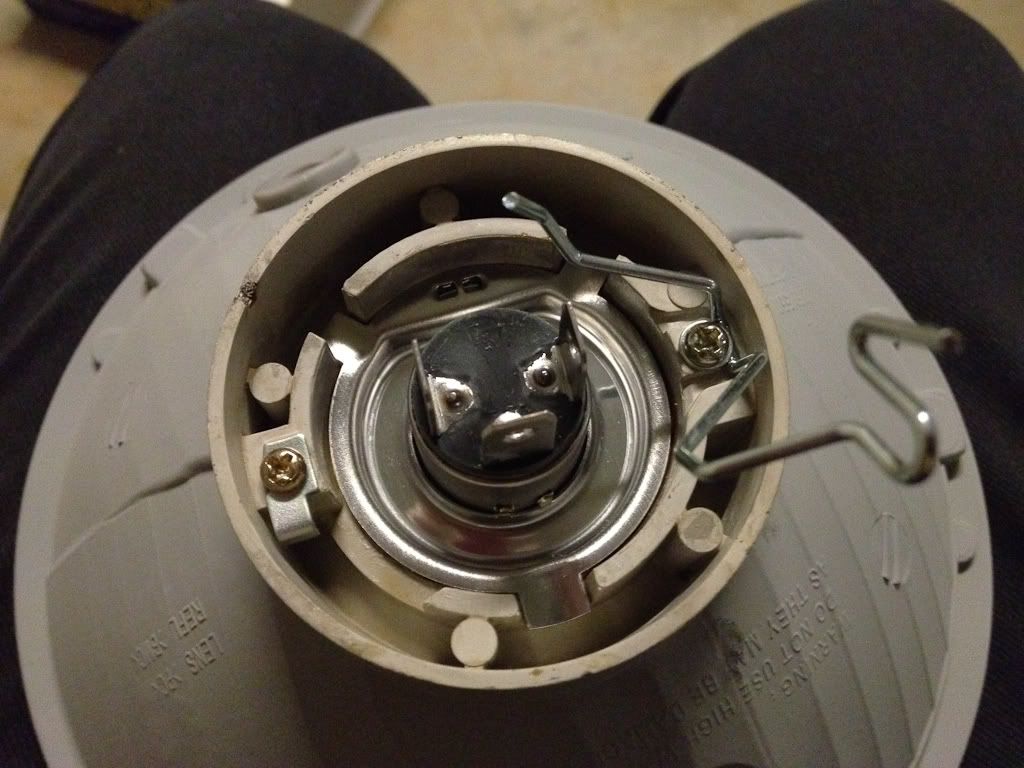
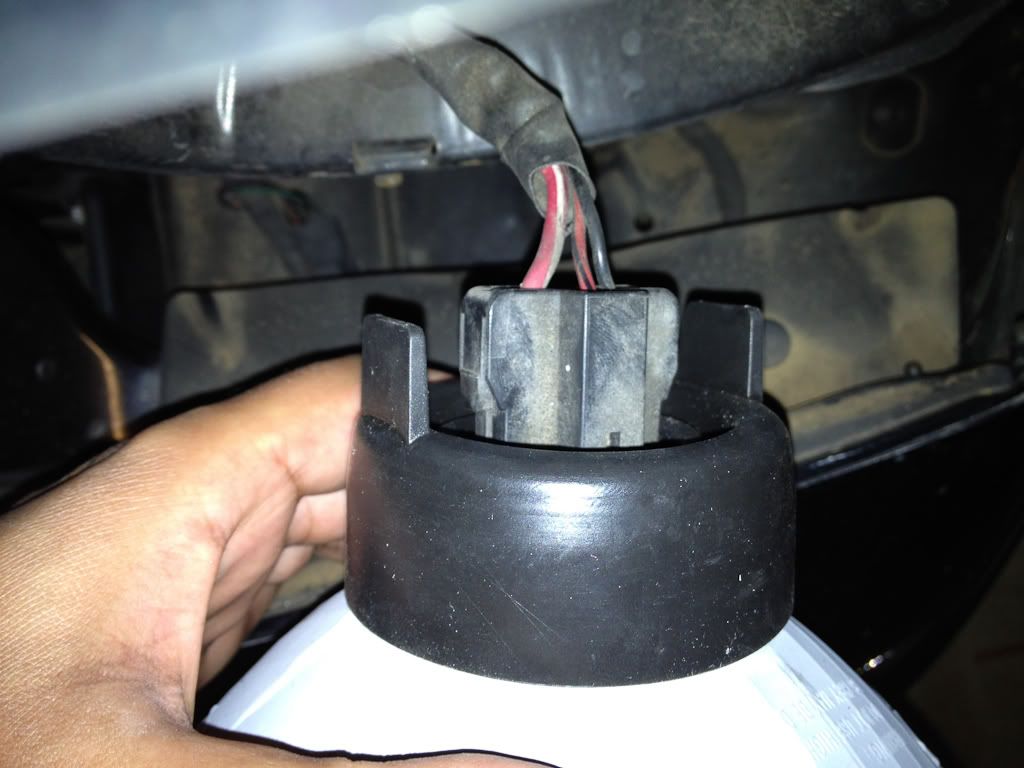
Pull off the shroud, loosen the three screws on the retaining ring (not remove, and avoid the longer screws which are for headlight aim), rotate to remove and the headlight unit comes out along with the retaining ring. You then pull off the wiring plug from the rear of the headlight leaving you with this
Image

No H4 replaceable bulb here, sealed up.
Image

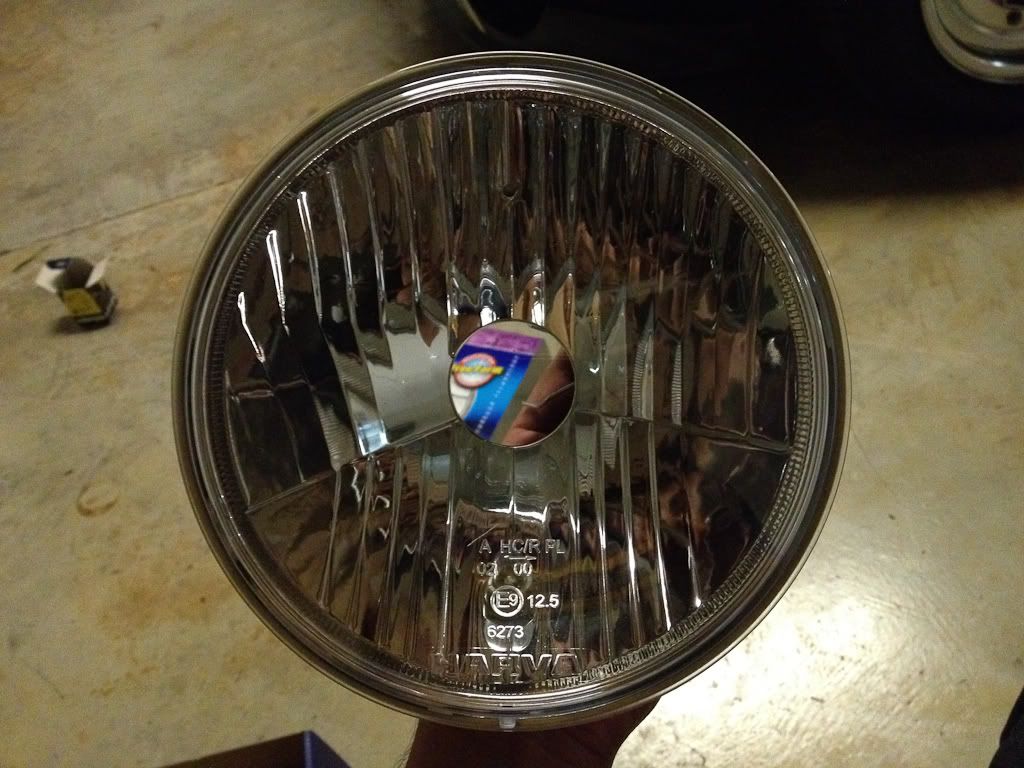
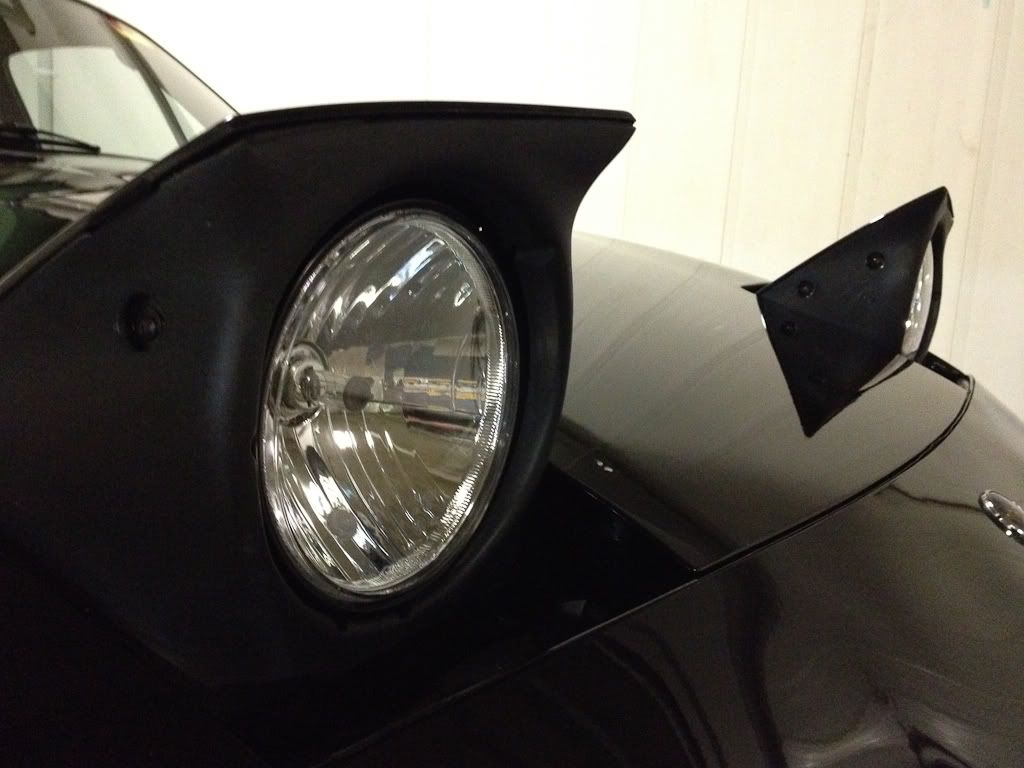
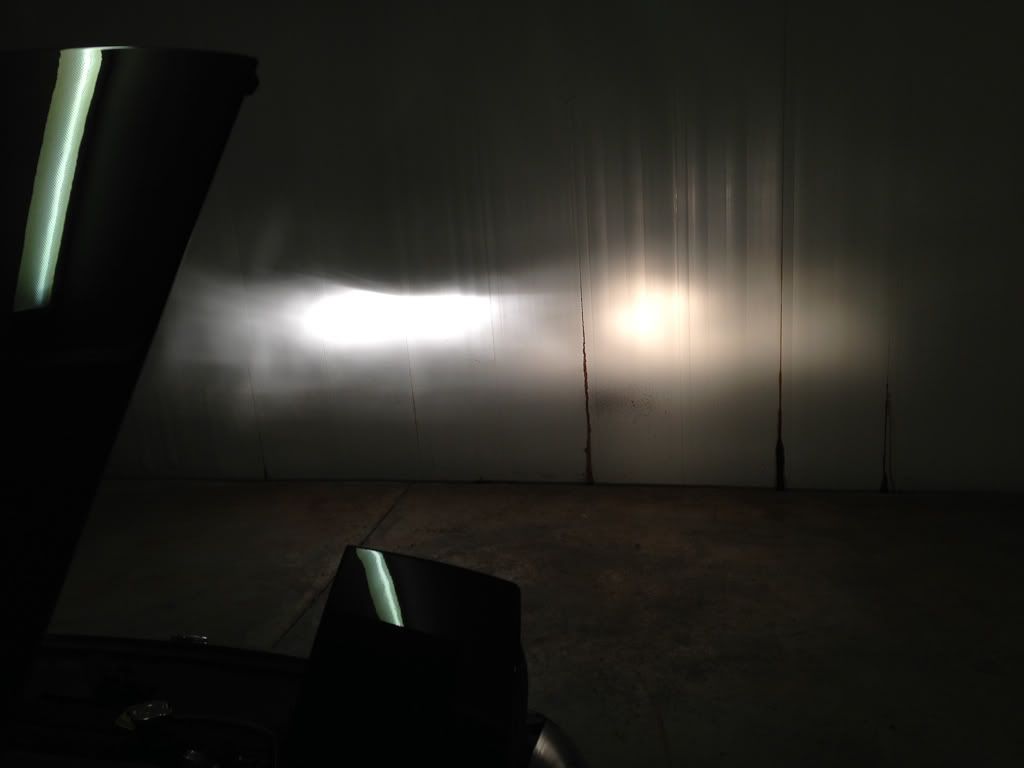
Rather than sourcing some new sealed beams, I opted for these NARVA H4 conversion units as I wanted to increase the lighting capacity from a dimly lit candle to something much more modern. After asking around on here and doing some research the NARVA units were sourced from the local auto parts shop after ringing around a few places.

They are E code units, which means they are to European standards, they also comply to ADR's.

Image

Compliments of the Germans
Image

Everything you need is here.
Image

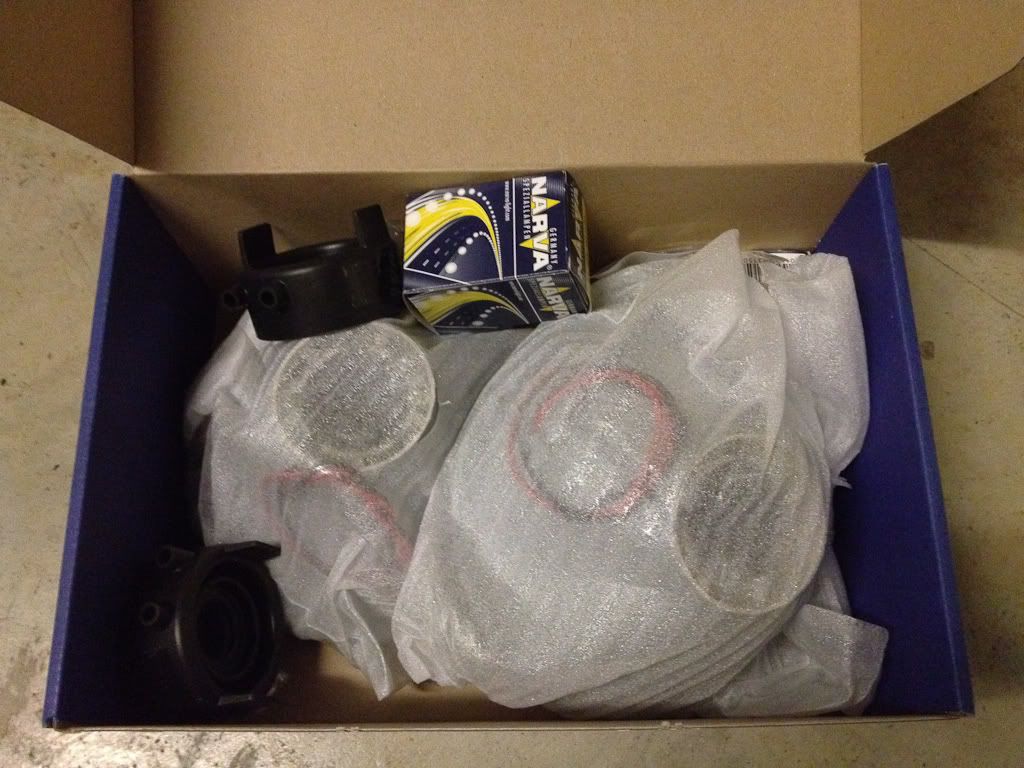
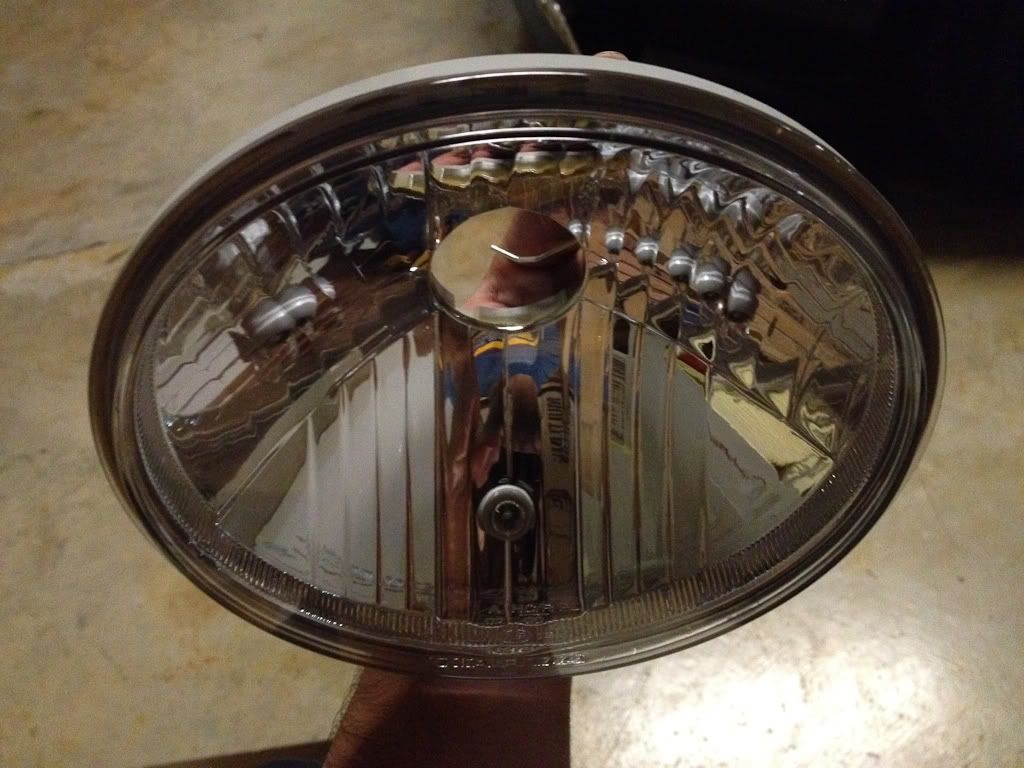
The kit comes with a pair of 'free form' headlight units - This is a more modern 'crystal' style unit, polycarbonate and with a much better beam pattern and cut off than traditional headlight designs like these.

Taz_
Driver
Posts: 58
Joined: Sun Jul 19, 2009 7:31 am
Vehicle: NA8
Location: Sydney
Contact:

Re: Taz's JDM NA8 S-Special: I don't need no steenkin hire c

Postby Taz_ » Sat Dec 31, 2011 9:38 pm

Also included are H4 bulbs, rubber boots for the rear of the bulbs to seal the connector from dirt and water, parking light fittings (there is provision for these inside these lights themselves) and parking lights.

Image

Here is the rear of the new unit, as you can see there is a metal latch for the new H4 bulbs and the wiring is for the park lights (this is optional to use given these alights are used in a number of applications)

Image

Here is the front

Image

You can see the park light I fitted below to show what it would look like

Image

Instead we fit this little plug since the parking lights are in the bumper on the Roadster.

Image

Like so

Image

Taz_
Driver
Posts: 58
Joined: Sun Jul 19, 2009 7:31 am
Vehicle: NA8
Location: Sydney
Contact:

Re: Taz's JDM NA8 S-Special: I don't need no steenkin hire c

Postby Taz_ » Sat Dec 31, 2011 9:39 pm

We then insert the bulbs into the rear of the housing by opening the metal clip, pretty straightforward

Image

Fit the rubber boots

Image

Plug it in

Image

Refit the headlight onto the car - they only fit one way as per the plug on the back.

Image

Let there be light!

New light on the left, much brighter, whiter light, wider beam pattern and a proper cut off like a modern car. The right is the measly dimly lit candle power headlight we had before. In real life the difference is more obvious and the clarity and cut off of the new light is more noticeable.

Image

Job done

Image


Return to “MX5 Garage Chat”

Who is online

Users browsing this forum: Google [Bot] and 14 guests