yea those organizers are awesome they were only $7 or so.
bought another one to organize all the valves, springs & retainers when they came out of the head.
Patchy's Fawlty Towers risk management. Enter at own risk
Moderators: timk, Stu, -alex, miata, zombie, Andrew
-
StanTheMan

- Forum legend
- Posts: 6824
- Joined: Thu Apr 24, 2003 11:00 am
- Vehicle: NA6
- Location: Balgowlah
Re: Patchy's Fawlty Towers risk management. Enter at own risk
Satans Ride called F33nix the resurrected NA6
-
StanTheMan
- Forum legend
- Posts: 6824
- Joined: Thu Apr 24, 2003 11:00 am
- Vehicle: NA6
- Location: Balgowlah
Re: Patchy's Fawlty Towers risk management. Enter at own risk
It's been slow going with the injured hand.
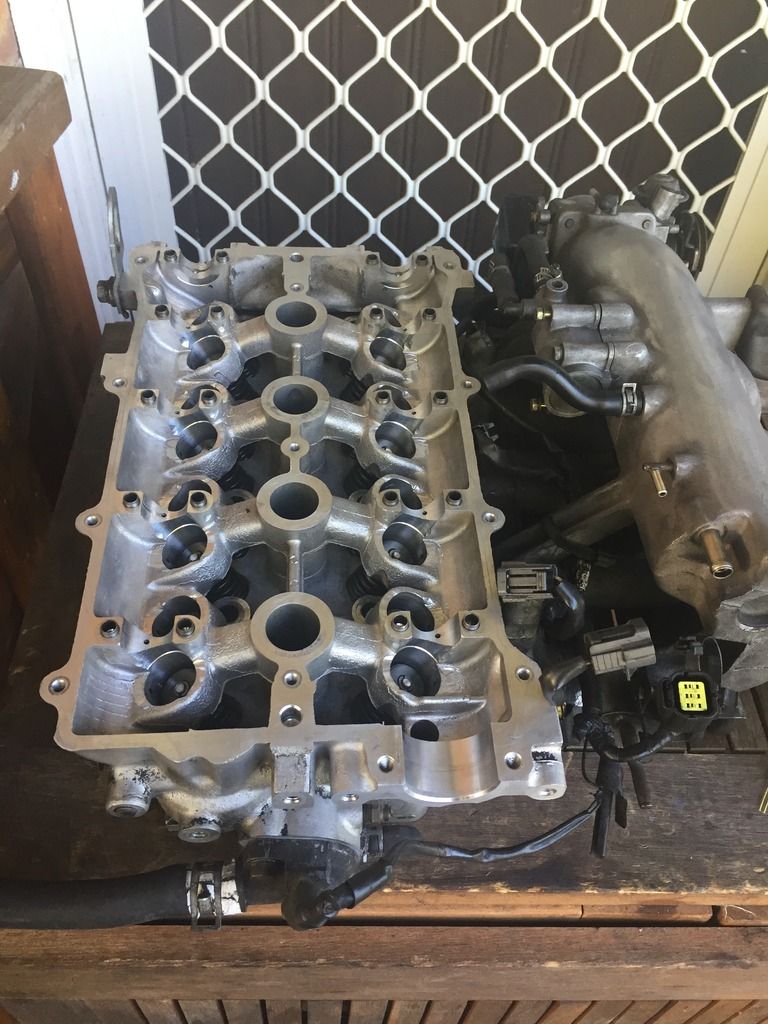
This morning I matched the manifold to the head.
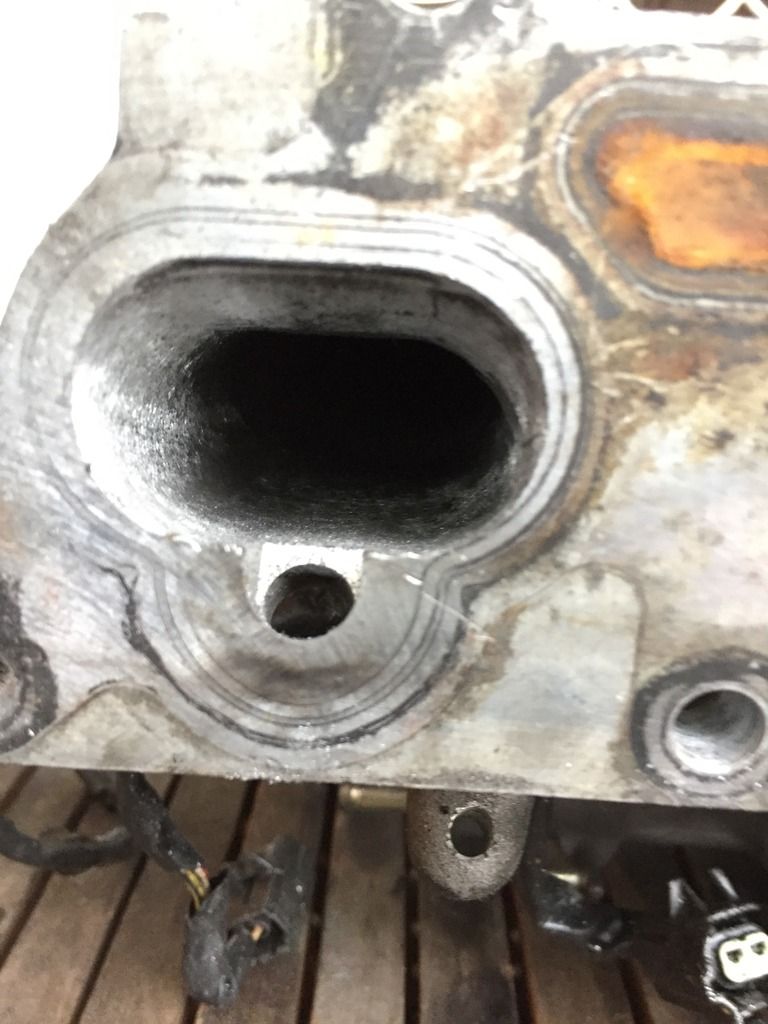
Removal was minimal
In most ports it was in the exact same position where I removed it.
I only used the stone to remove bumps & uneven surface went as deep as I could.
Very happy with that result
You can kind of see the lege at the end there. It's pretty closely matched. By sight only. Manifold came on & off a few times to make sure I was close.
I've only cleaned up the exsaust ports. I'm not going to do much with them. But the next important step is to clean the head as it has metal shavings everywhere in particular within the valve guides.
Then I'll grind the valves so the seating is 100%
I've also scratched them a bit while working .
everything is going well for prolly 2 or 3 weeks being back together. Then if everything works out I'll pull the trigger on the ms2pnp. If anyone has one sitting around they may want to sell. Send me a pm.
This morning I matched the manifold to the head.
Removal was minimal
In most ports it was in the exact same position where I removed it.
I only used the stone to remove bumps & uneven surface went as deep as I could.
Very happy with that result
You can kind of see the lege at the end there. It's pretty closely matched. By sight only. Manifold came on & off a few times to make sure I was close.
I've only cleaned up the exsaust ports. I'm not going to do much with them. But the next important step is to clean the head as it has metal shavings everywhere in particular within the valve guides.
Then I'll grind the valves so the seating is 100%
I've also scratched them a bit while working .
everything is going well for prolly 2 or 3 weeks being back together. Then if everything works out I'll pull the trigger on the ms2pnp. If anyone has one sitting around they may want to sell. Send me a pm.
Satans Ride called F33nix the resurrected NA6
-
StanTheMan
- Forum legend
- Posts: 6824
- Joined: Thu Apr 24, 2003 11:00 am
- Vehicle: NA6
- Location: Balgowlah
Re: Patchy's Fawlty Towers risk management. Enter at own risk
D-Double post.......so sorry 
Last edited by StanTheMan on Sat Oct 22, 2016 11:14 am, edited 1 time in total.
Satans Ride called F33nix the resurrected NA6
-
StanTheMan
- Forum legend
- Posts: 6824
- Joined: Thu Apr 24, 2003 11:00 am
- Vehicle: NA6
- Location: Balgowlah
Re: Patchy's Fawlty Towers risk management. Enter at own risk
May need to give the head on other decking as I've scratched it up a bit. Will see what the machinist reckons. So the lesson here is pehaps do all the porting & polishing first. Then go & get it shaved.
Satans Ride called F33nix the resurrected NA6
-
StanTheMan
- Forum legend
- Posts: 6824
- Joined: Thu Apr 24, 2003 11:00 am
- Vehicle: NA6
- Location: Balgowlah
Re: Patchy's Fawlty Towers risk management. Enter at own risk
So here we are, finished the porting today.
I made some mistakes, so hopefully this write up may help other first timers break thier cherry with a simple port job.
This was my first attempt
I'm far from a pro. I have no clue about how to make the B6 head blow like a cyclone. For me it was more about having a go & hopefully get some results. I'll never know as I don't have a flow bench. It is what it is.
First step was to read as much as I could. There wasn't much B6 specific info on the net. Or I didn't find it. Plenty of info on the BP porting. But this is about a NA6 ghetto port & match.
There is plenty of guides step by step on DIY porting.
I purchased a porting kit from the states.
I purchased this because the guide I was reading used this. It cost me about $75 US plus another $60 to ship it.
Don't bother. Some of the wheels were too big & wouldn't fit into the ports. It was pointless. And because they went on about those wheel I thought I had to have it.
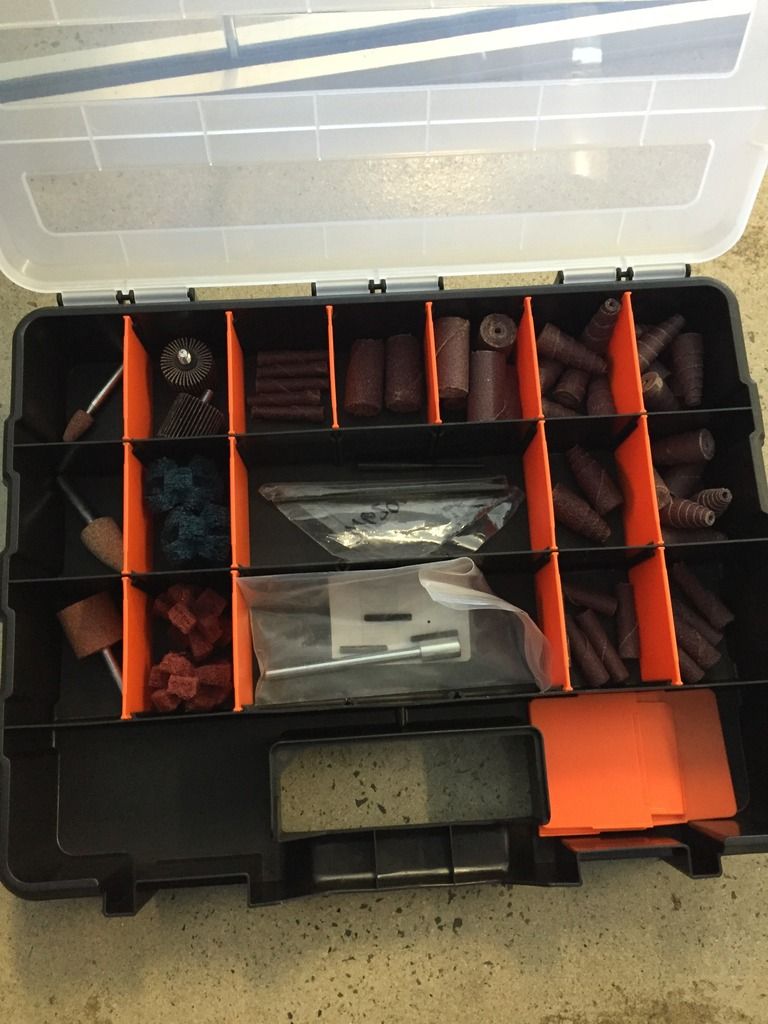
I need this
The 2 stones were great. Bottom row big one was great for the circular parts of the port small one was great for the small tight places . The big orange one was useless because it was too big to use. All 3 stones were that same orange.
Above that you can see the rolls
5 types in 2 grades 40& 80
Above that you also see those flapping wheels. 120 grade. Awesome
You also need to mount them
You can get the same kits for about $35 on eBay. I can't comment on the eBay quality. But the ones I used never ripped.
Those other wheel red & blue are pointless. They were the reason I went to the expense of purchasing this kit. They were too big
They are supposed to be for polishing the cylinder dome thingy. It was just not accurate enough & I had the impression that I would do more damage than good .
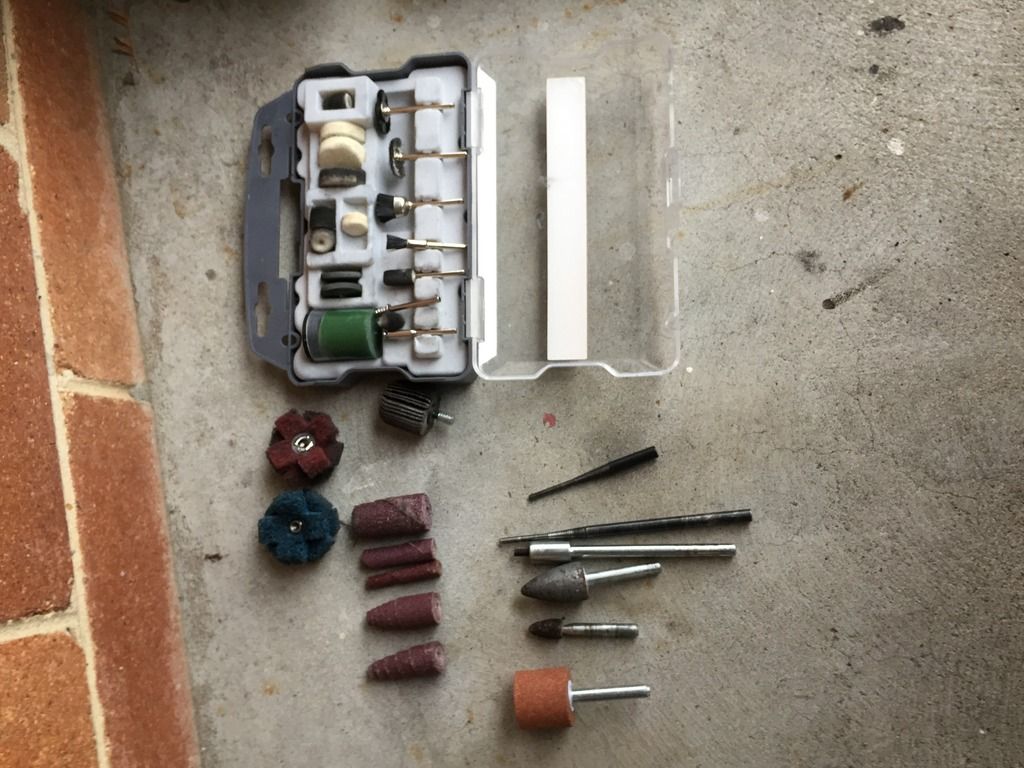
Originally I wast going to polish the exsaust side. But got bored today & decided to clean the carbon deposits a bit
I ended up using a $5 kit from Bunnings which you can see in the pic. A bit painful & 0perhaps a little fragile to use but it worked.
Tb continued
I made some mistakes, so hopefully this write up may help other first timers break thier cherry with a simple port job.
This was my first attempt
I'm far from a pro. I have no clue about how to make the B6 head blow like a cyclone. For me it was more about having a go & hopefully get some results. I'll never know as I don't have a flow bench. It is what it is.
First step was to read as much as I could. There wasn't much B6 specific info on the net. Or I didn't find it. Plenty of info on the BP porting. But this is about a NA6 ghetto port & match.
There is plenty of guides step by step on DIY porting.
I purchased a porting kit from the states.
I purchased this because the guide I was reading used this. It cost me about $75 US plus another $60 to ship it.
Don't bother. Some of the wheels were too big & wouldn't fit into the ports. It was pointless. And because they went on about those wheel I thought I had to have it.
I need this
The 2 stones were great. Bottom row big one was great for the circular parts of the port small one was great for the small tight places . The big orange one was useless because it was too big to use. All 3 stones were that same orange.
Above that you can see the rolls
5 types in 2 grades 40& 80
Above that you also see those flapping wheels. 120 grade. Awesome
You also need to mount them
You can get the same kits for about $35 on eBay. I can't comment on the eBay quality. But the ones I used never ripped.
Those other wheel red & blue are pointless. They were the reason I went to the expense of purchasing this kit. They were too big
They are supposed to be for polishing the cylinder dome thingy. It was just not accurate enough & I had the impression that I would do more damage than good .
Originally I wast going to polish the exsaust side. But got bored today & decided to clean the carbon deposits a bit
I ended up using a $5 kit from Bunnings which you can see in the pic. A bit painful & 0perhaps a little fragile to use but it worked.
Tb continued
Satans Ride called F33nix the resurrected NA6
-
StanTheMan
- Forum legend
- Posts: 6824
- Joined: Thu Apr 24, 2003 11:00 am
- Vehicle: NA6
- Location: Balgowlah
Re: Patchy's Fawlty Towers risk management. Enter at own risk
Gawd just lost a massive post. Arrrrgh......
Satans Ride called F33nix the resurrected NA6
-
StanTheMan
- Forum legend
- Posts: 6824
- Joined: Thu Apr 24, 2003 11:00 am
- Vehicle: NA6
- Location: Balgowlah
Re: Patchy's Fawlty Towers risk management. Enter at own risk
One of the useless bits
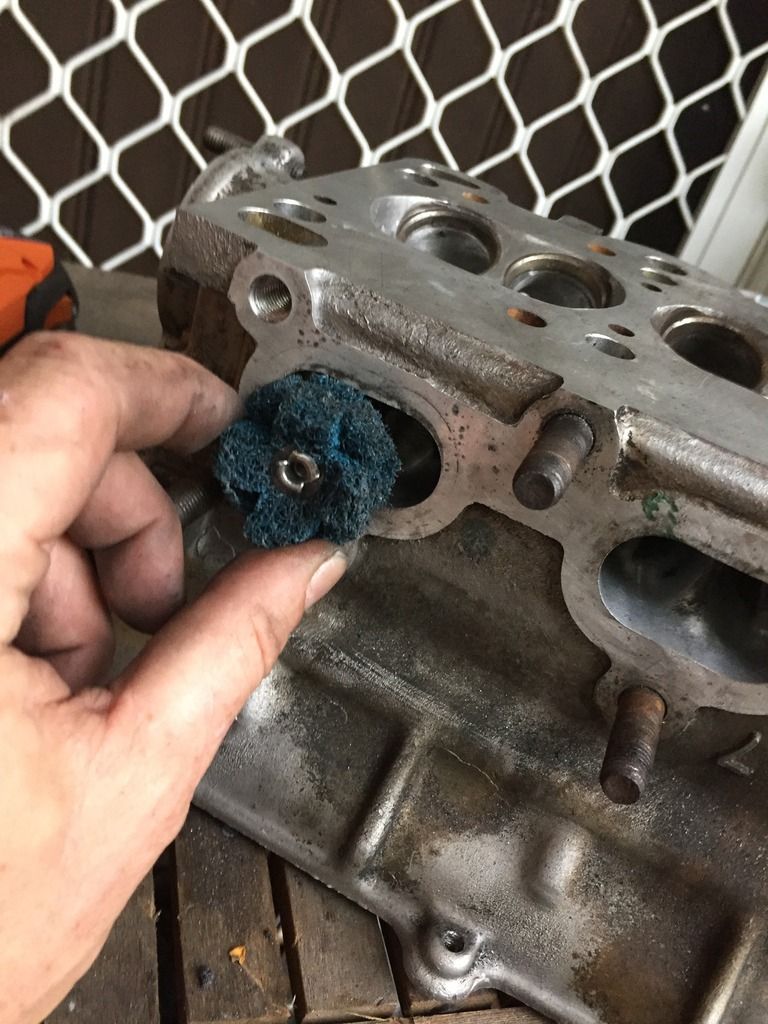
They are a buffing wheel & the reason I purchased the kit. They are designed to buff & polish . Unfortunately too big for the exsaust port.
They can be used for the cylinder bowl. But I found it too big and not accurate enough. I felt I was doing more damage than good .
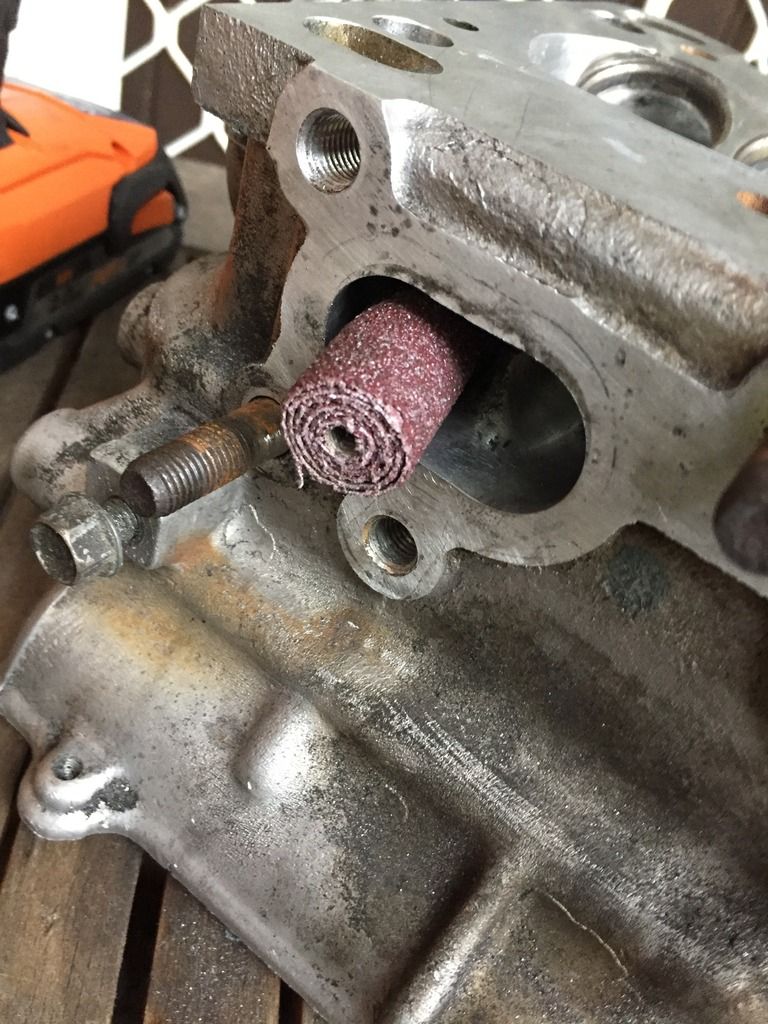
This was one of the rolls. Two grades. 40& 80 perfect to get those round parts smooth. Although the stones need to be used first to get rid of those overrun& & uneven casting surfaces.
They are a buffing wheel & the reason I purchased the kit. They are designed to buff & polish . Unfortunately too big for the exsaust port.
They can be used for the cylinder bowl. But I found it too big and not accurate enough. I felt I was doing more damage than good .
This was one of the rolls. Two grades. 40& 80 perfect to get those round parts smooth. Although the stones need to be used first to get rid of those overrun& & uneven casting surfaces.
Satans Ride called F33nix the resurrected NA6
-
StanTheMan
- Forum legend
- Posts: 6824
- Joined: Thu Apr 24, 2003 11:00 am
- Vehicle: NA6
- Location: Balgowlah
Re: Patchy's Fawlty Towers risk management. Enter at own risk
As mentioned before
Today just happened. I wasn't going to touch the exsaust port originally.
So I started removing some more of those thick layers of carbon deposits. One thing lead to another
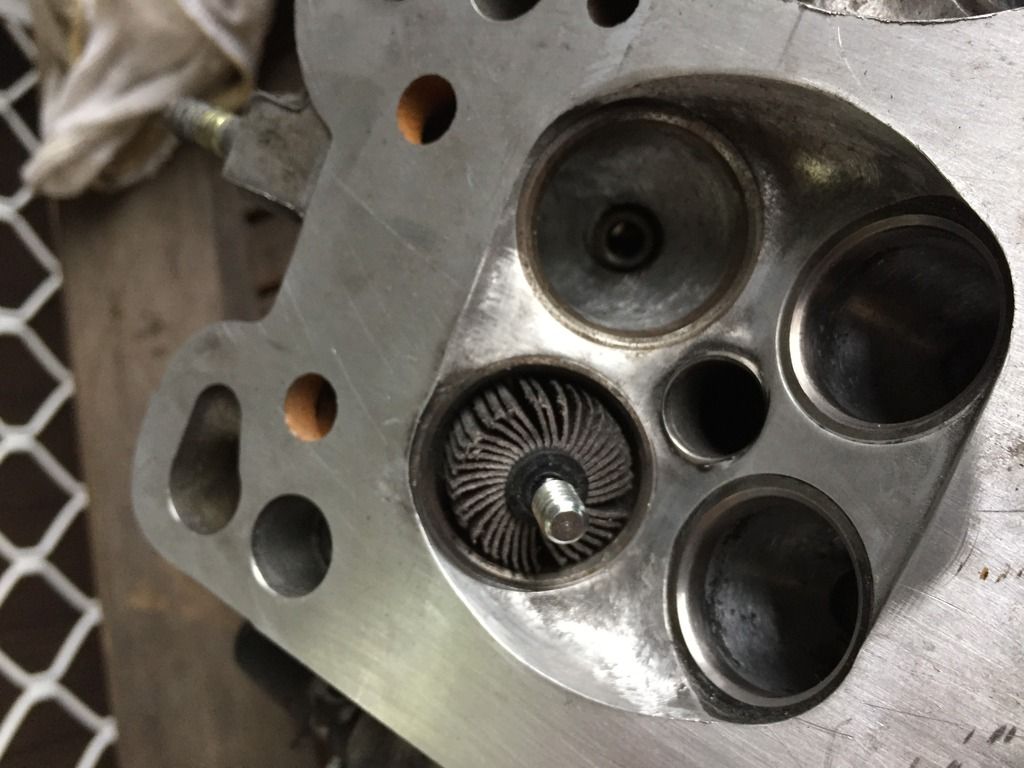
Got the 120 grade flapp wheel in & it made a serious difference in the finish
From there I found the polish kit from a few posts back it's designed for a demel.i ended up giving it a polish.
In this case I used a drill. Not sure why. Felt better.
It's far from perfect but hopefully bettter than leaving it as it was. I figure it will be back to where it was within a few weeks of driving? Not sure.
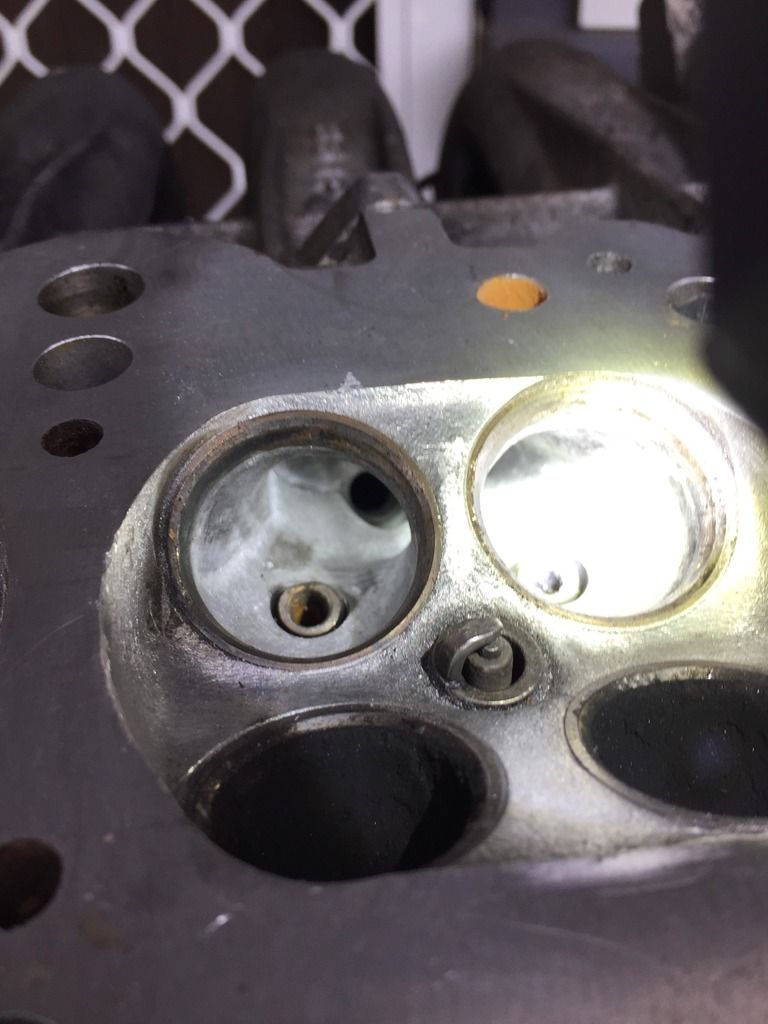
This is the result.
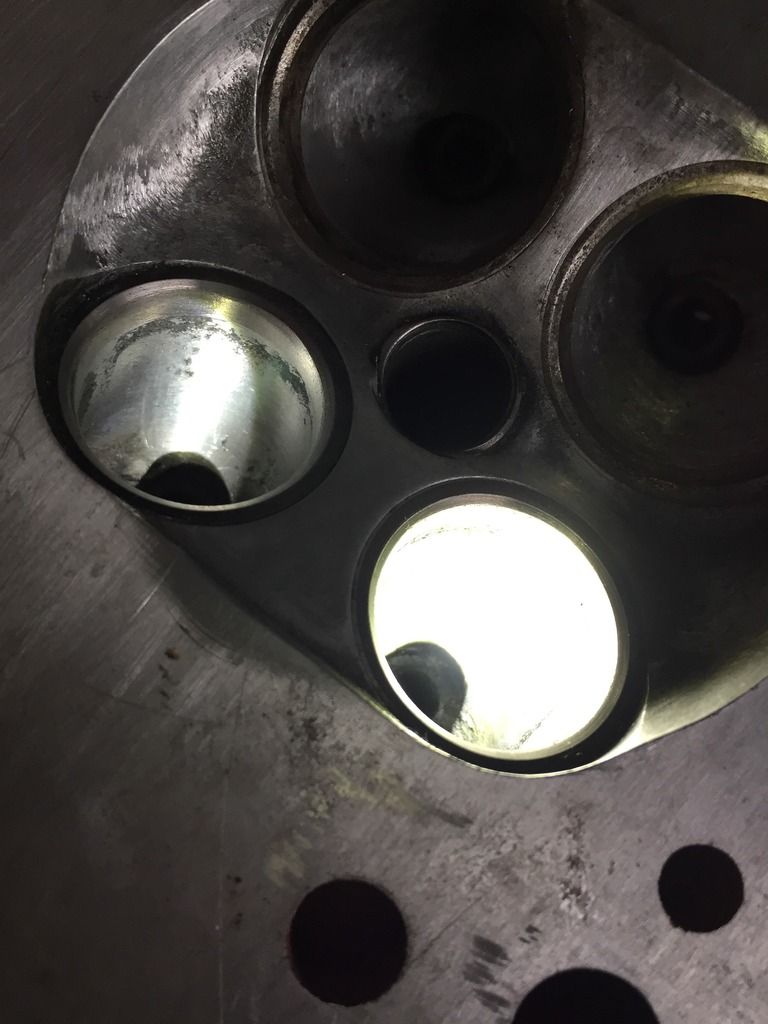
The black bits just under the valve seats are uneven surface. If this was the intake port I would have smoothed it out a bit more.
I then gave the valve guides a good clean tith a very thin bottle washer& ground the valve seats.
All I managed was the 2 exsaust valve seats in the cylinder.
It will continue next week.
Some may also spot some scratches on the deck of the head. Do I need to get that seen to?
Today just happened. I wasn't going to touch the exsaust port originally.
So I started removing some more of those thick layers of carbon deposits. One thing lead to another
Got the 120 grade flapp wheel in & it made a serious difference in the finish
From there I found the polish kit from a few posts back it's designed for a demel.i ended up giving it a polish.
In this case I used a drill. Not sure why. Felt better.
It's far from perfect but hopefully bettter than leaving it as it was. I figure it will be back to where it was within a few weeks of driving? Not sure.
This is the result.
The black bits just under the valve seats are uneven surface. If this was the intake port I would have smoothed it out a bit more.
I then gave the valve guides a good clean tith a very thin bottle washer& ground the valve seats.
All I managed was the 2 exsaust valve seats in the cylinder.
It will continue next week.
Some may also spot some scratches on the deck of the head. Do I need to get that seen to?
Satans Ride called F33nix the resurrected NA6
-
StanTheMan
- Forum legend
- Posts: 6824
- Joined: Thu Apr 24, 2003 11:00 am
- Vehicle: NA6
- Location: Balgowlah
Re: Patchy's Fawlty Towers risk management. Enter at own risk
Took the afternoon of to get the head ready for install on Saturday.
Unfortunately it's not going to happen.
Between the Spring & the base of the head is a very thin stainless washer. Maybe 0.1mm thick? Not thick at all.
I've lost one. Can't find it anywhere. Not even sure where to get them from.
Maybe someone has one lying around?
Maybe I''ll check with the machine shop.
Prolly unlikely I'll source one by Saturday.
I assume it is there to protect the aluminium from the spring?
Satans Ride called F33nix the resurrected NA6
-
StanTheMan
- Forum legend
- Posts: 6824
- Joined: Thu Apr 24, 2003 11:00 am
- Vehicle: NA6
- Location: Balgowlah
Re: Patchy's Fawlty Towers risk management. Enter at own risk
Patchy is back together but not starting ha'ha.
After almost 3 months sitting the battery gave up the ghost reasonably quickly
Tomorrow or next week I'll go back to basics first.
This is what I know
She's certainly not getting fuel
Fuel pump fine.
fuel relay not sure.
Cam Timing 99.9 % sure it's right on but will check again.
Spark? Not sure will need to check.
What I'm suspecting though is that perhaps I've connected the fuel rail the wrong way around. I know fuel flows though it.
But does it matter on direction?
Satans Ride called F33nix the resurrected NA6
-
smy0003

- Racing Driver
- Posts: 1870
- Joined: Mon Dec 30, 2013 12:35 pm
- Vehicle: NA8
- Location: Melbourne
Re: Patchy's Fawlty Towers risk management. Enter at own risk
The connection on the front of the fuel rail connects to the fuel harline in the right, if that helps.
The rubber hoses from the hardliner to the rail shouldn't cross over each other.
Sent from my LG-H815 using Tapatalk
The rubber hoses from the hardliner to the rail shouldn't cross over each other.
Sent from my LG-H815 using Tapatalk
[b]Then: Sunlight Silver NB8B
Now: Chaste White NA8
Now: Chaste White NA8
-
StanTheMan
- Forum legend
- Posts: 6824
- Joined: Thu Apr 24, 2003 11:00 am
- Vehicle: NA6
- Location: Balgowlah
Re: Patchy's Fawlty Towers risk management. Enter at own risk
That's the way it's connected.
Satans Ride called F33nix the resurrected NA6
-
93_Clubman
- Speed Racer
- Posts: 12012
- Joined: Mon Aug 08, 2005 11:35 pm
- Vehicle: Clubman
- Location: Melbourne
Re: Patchy's Fawlty Towers risk management. Enter at own risk
StanTheMan wrote:She's certainly not getting fuel.
Fuel pump fine.
Fuel relay not sure.
There's two relays - one under the dash for the fuel pump, & one in the engine bay fuse box for the fuel injection.
Appreciate fuel pump is fine, but if you haven't already, it's worth checking for 'blackwire':
93_Clubman wrote:Check for the blackwire issue inside the top of the fuel tank gauge/pump assembly that affects the fuel pump itself - initially it results in intermittent power to the fuel pump & not-starting - eventually it's gets so bad it won't start at all:
viewtopic.php?f=55&t=46425
Good pic here of the actual issue, given pics links in above are stuffed:
viewtopic.php?f=55&t=70835
-
StanTheMan
- Forum legend
- Posts: 6824
- Joined: Thu Apr 24, 2003 11:00 am
- Vehicle: NA6
- Location: Balgowlah
Re: Patchy's Fawlty Towers risk management. Enter at own risk
Ok cheers I'll check that.
Not sure how to test relays. Might have to call a friend.
Not sure how to test relays. Might have to call a friend.
Satans Ride called F33nix the resurrected NA6
-
hks_kansei

- Speed Racer
- Posts: 6154
- Joined: Tue Feb 03, 2009 10:43 am
- Vehicle: NB8A
- Location: Victoria
Re: Patchy's Fawlty Towers risk management. Enter at own risk
StanTheMan wrote:Ok cheers I'll check that.
Not sure how to test relays. Might have to call a friend.
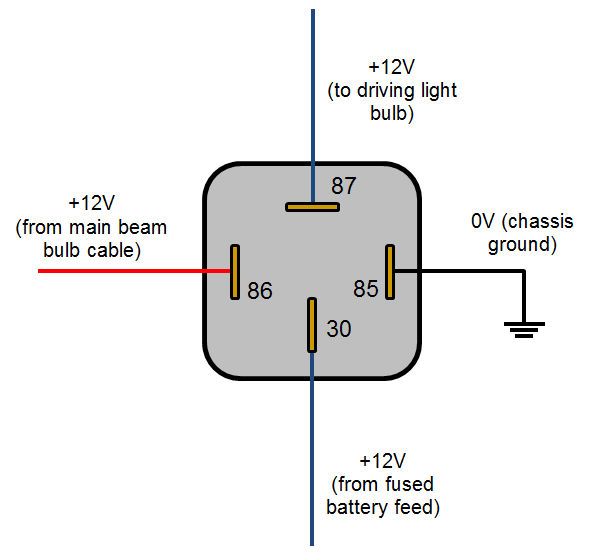
When they're out of the car they'll usually have 4 pins.
Two are for the low current, from the ecu or whatever.
The other two are for the high current, the thing they're switching on and off.
You should be able to test them easily on the bench with a spare battery.
Wire the ground pins to the neg terminal.
Wire the high current positive to a spare light bulb, or multimeter (something that can let you know power gets there, the bulb will light up)
Then put power to the low current, when you do the light you wired in should turn on, when you remove the low current wire it should go off.
http://www.12voltplanet.co.uk/user/Driv ... iagram.png
There's a diagram of a basic relay.
Most have the same numbers written on them as in the diagram..... But the na seems to often use weird proprietary relays I've noticed.
1999 Mazda MX5 - 1989 Honda CT110 (for sale) - 1994 Mazda 626 wagon (GF's)
Return to “MX5 Body, Paint, Interior & Trim”
Who is online
Users browsing this forum: No registered users and 2 guests


